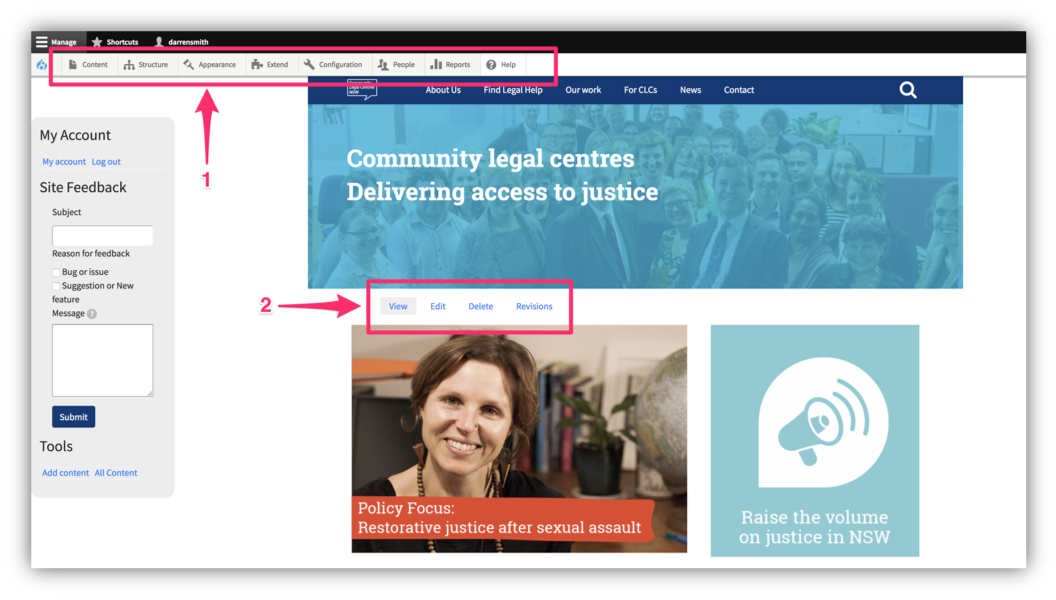
After you log in to the content admin, you will notice two menus appear on website pages. This gives you an admin view of the website.
- Top navigation menu — use to add new content
At the top, you’ll notice a menu with some options for accessing areas of the content admin. The most important one is ‘Content’ — this is where you create new web pages or upload content like files and images.
- Page editing menu — use to make changes to existing pages
Below the websites banner, you’ll notice a menu with options view, edit, delete, and revisions. This menu gives you access to the content admin for that specific page. For example, you can click on ‘Edit’ to make changes to that specific page. So long as you are logged in, these options will appear on every page as you navigate across the website.
Clicking on ‘Edit’ in the page editing menu will take you directly to the admin for that page, where you can make changes to the text, images, and layout.
You willl see a ‘My Account’ area on the left-hand side.
- Click on ‘My account’ to access your admin account details, including to change your password.
- Click on ‘Log out’ to log out of the admin view and view the site as a non-admin would.
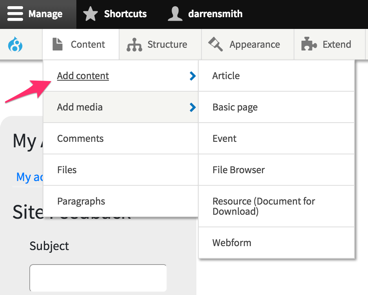
Content Menu
When you click on ‘Content’ in the top navigation, a menu will drop down with some options for adding new content. There are two options for adding content depending on the type of content you want to add. When you hover over ‘Add content’ or ‘Add media’, you’ll notice a secondary menu drop down with more specific content options.
Add Content - Basic pages, articles, events.
Add Media - Files (such as PDFs or Word docs), images.
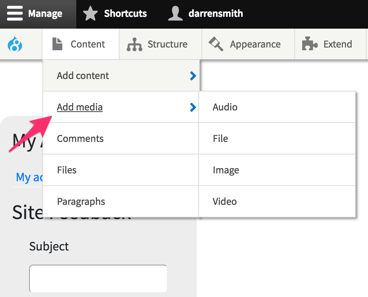
Once you choose the content type to add, you’ll then be taken to the admin page for creating that page or uploading the image/file.